Android 5.1 is considered to be a polished version of the bug infested Android 5.0. Android 5.0 ‘Lollipop‘ was supposed to be a revolutionary upgrade in the Android world, instead it was a disappointment to its fans. The Lollipop 5.0 was slow and wrecked with bugs. Google has already fixed a nest of bugs in the Android 5.1 which have tainted the Lollipop glamour for Android 5.0 users upon its release. Google has also enhanced a lot of Android 5.0 features in the newly released version and added new, better ones. Perhaps one of the best newly integrated features in the Android 5.1 is the “Device Protection“.
What is ‘Device Protection’?
Similarly to Apple’s Activation Lock feature, Device Protection to remotely fortify your device against anyone who tries to access it, making it completely useless for any unauthorized user who attempts to login and wipe your device by requiring your Google account’s name and password. As it is mentioned on Google’s Support:
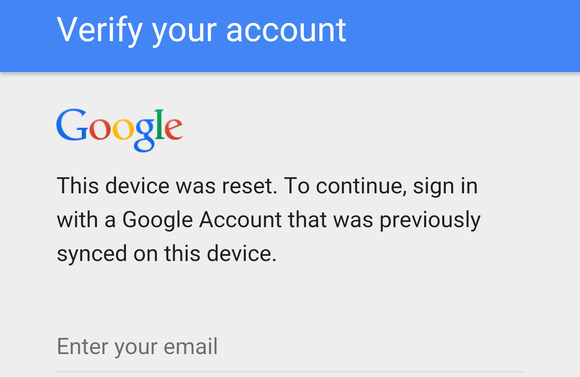
“You can set up your device to prevent other people from using it if it’s been reset to factory settings without your permission. For example, if your device is lost, stolen, or wiped, only someone with your Google account or screen lock information can use the device.”
This powerful feature is only available on Nexus 6, Nexus 9, and new Android 5.1 devices. Unfortunately, Nexus 4, 5, 7 (2012 and 2013), and 10 will not get the Device Protection, according to Google’s support:
“This information applies only to devices running Android 5.1 or higher that came preinstalled with Android 5.0 or higher, such as Nexus 6 and Nexus 9.”
Simply put, “Device Protection” is an extra security tweak to your device’s lock screen. If you have a Google account and enable this feature, it will shield you from identity theft by basically averting any thief from factory-resetting your device without the password for the Google profile used previously on the device. The Device Protection feature came after a few laws endorsed in the US demanding smartphones to have factory reset and anti-theft features.
Although Device Protection prevents thieves and phishers from accessing your phone and using it, it won’t function properly without certain settings. What’s more, it can bounce back if you forget disabling it when, for instance, you decide to sell your phone. Therefore, you need to know how Device Protection works and how to use it properly.
In this article, we will show you how Android’s Device Protection works exactly.
How to Activate and Use Device Protection in Android 5.1
Device Protection is already auto-activated for the models running Android 5.1, but how can you be so sure that it is activated and working properly. Also, how can you disable it? Here is how:
Things you need for this process:
1- Compatible device (Android 5.1 supported devices, Nexus 6, Nexus 9 or above).
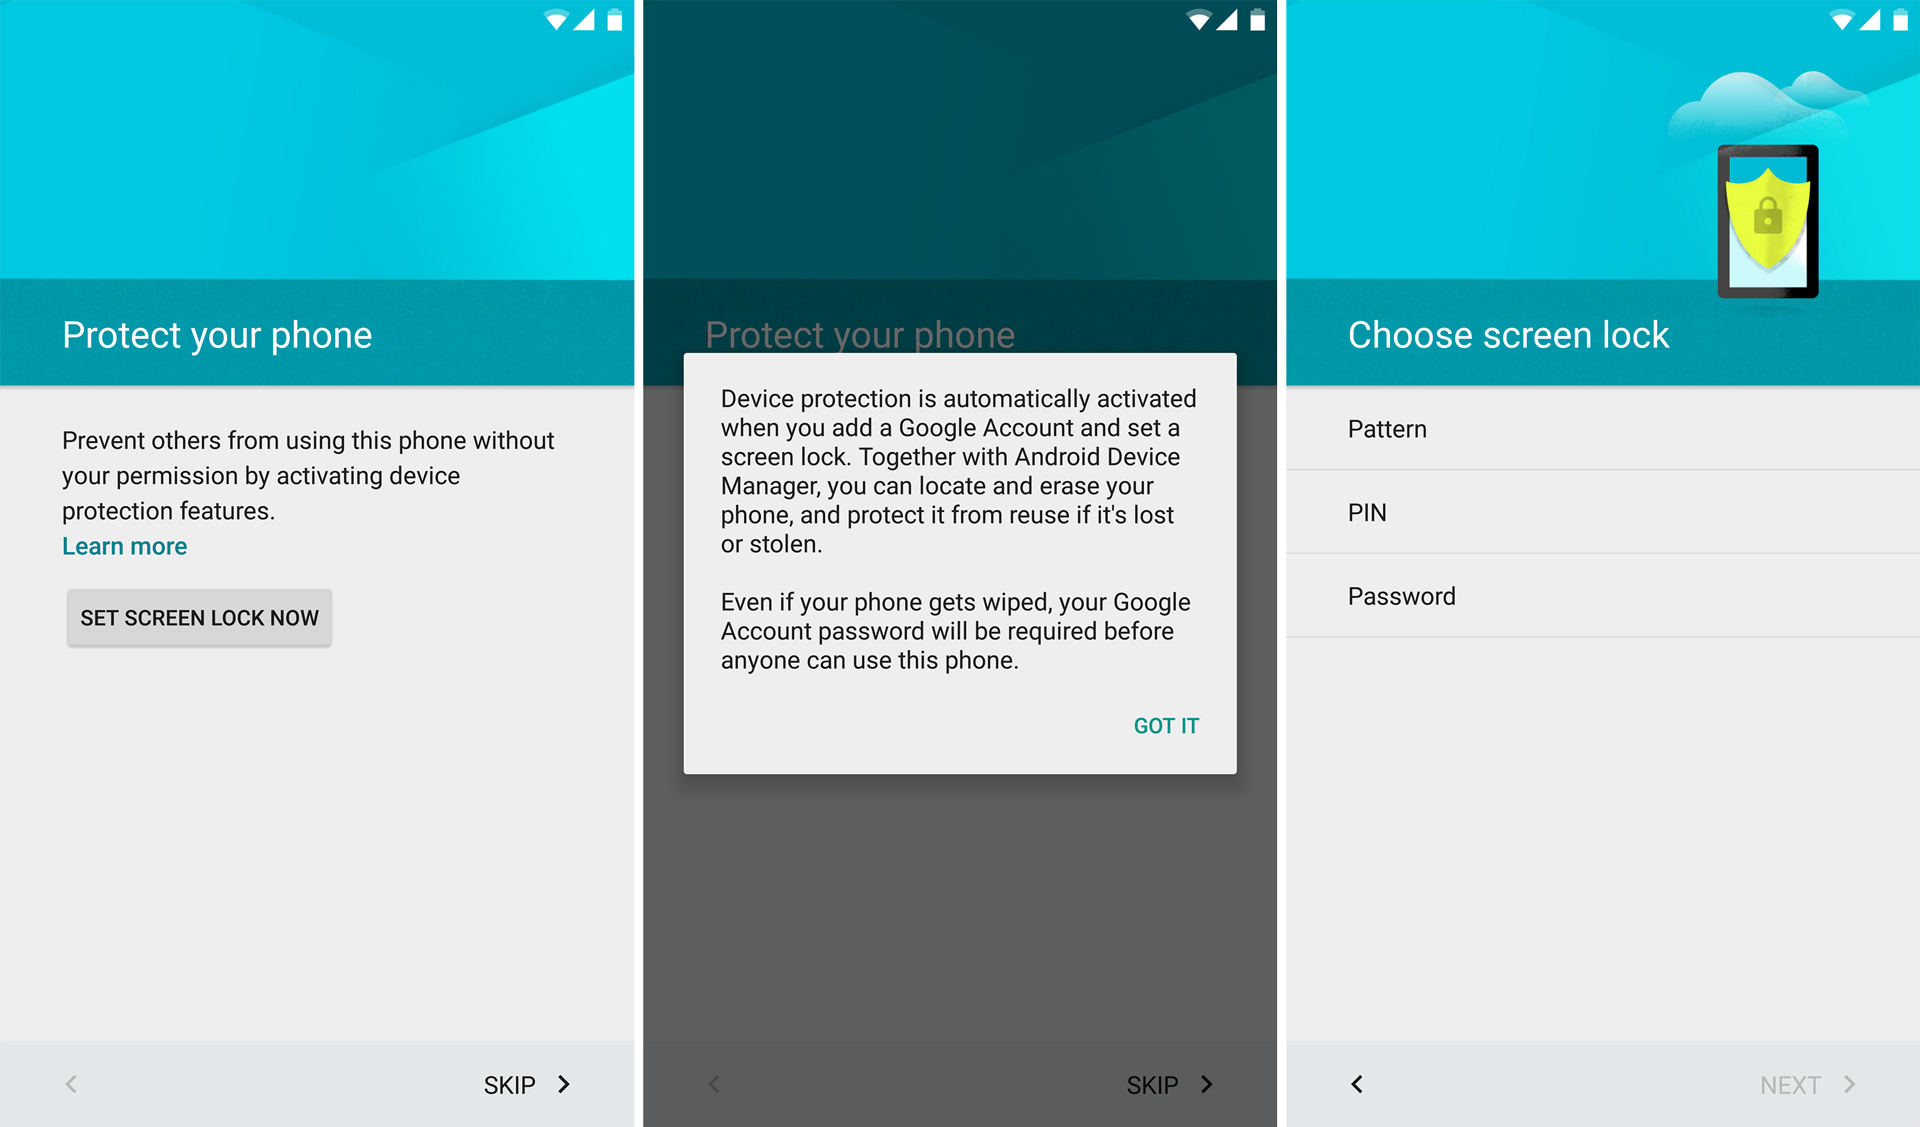
2- Secured lock screen with Pin, Pattern or Password.
3- Sign into at least one Google account.
Once you get this done, go to “Settings” and tap on “Security Options”. Next, make your lock screen insecure by choosing the “Swipe” option. You will be prompted immediately with this message:
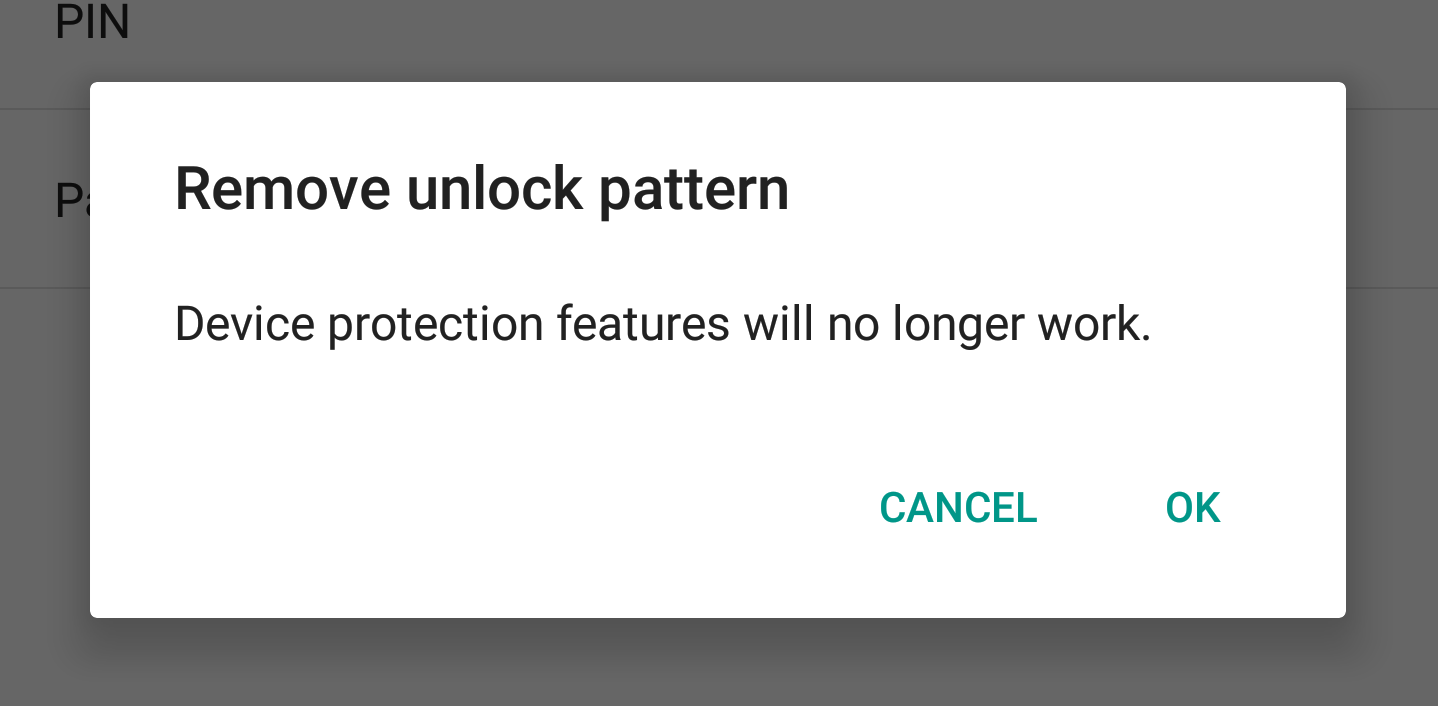
Cheers! You have Device Protection installed to your device. In this way, if anybody tried to get into your phone, they won’t be able to bypass the setup. However, you must keep in mind that if you lend someone your device and even decide to sell it, you must disable the Device Protection feature, otherwise the person you have given your device to won’t be able to use it. All you need to do is switch your lock screen to “Swipe” mode and remove your Google account.Device Protection is just a security tool designed to protect your phone from identity theft. So if your device is stolen, you won’t be able to tack it through this feature.
