
If you are located behind a restrictive firewall; such as: China, Oman or Iran, that uses SPI to filter web content, like: Facebook, Twitter, Youtube, Hulu and Netflix as well as certain services, like: Skype, Viber or What’sAPP rather than traditional filtering methods, your only chance to bypass this kind of Herculean filtering is by using an OpenVPN protocol tunnelled over an SSH. This process double encrypts your regular VPN making it impossible for an SPI to detect your connection.
In this article we will explain how you can tunnel an OpenVPN over SSH in two different methods: manually and automatically. Check our step-by-step tutorial below.
How to Tunnel OpenVPN over SSH (Manually)
Step 1: Before Gettings Started:
In order to establish an SSH tunnel to be used as a SOCKS 5 proxy so that you can tunnel OpenVPN or any SOCKS 5 supported software, you will need a few things first. This can be very helpful when your OpenVPN is blocked by an ISP firewall, or when you are in need of an extra layer of encryption. Here is what you need:
1- A remote server to be able to connect to via SSH. After you signup, you will be given the SSH server IP.
2- A remote OpenVPN server. A registration to an OpenVPN service and OpenVPN client is required.
3- Port 443 in order to bypass firewalls and proxies.
4- Putty software.
You can comfortably get started with your mission to tunnel OpenVPN over SSH right after you have those things ready.
Step 2: Download and Install Putty
This step is hardly rocket science. Just head over to Putty’s official website and download the putty.exe executable file. It doesn’t even require an installation, all you have to do is download it, save it in a folder, and then it’s ready to be launched.
Step 3: SSH Tunnel Configuration
In this step you will use Putty in order to construct an SSH tunnel which will be connected to your remote server. In order to carry out this process, you will need the SSH server IP that was sent to you upon your registration.
You will see a window like the one displayed below right after your run Putty:
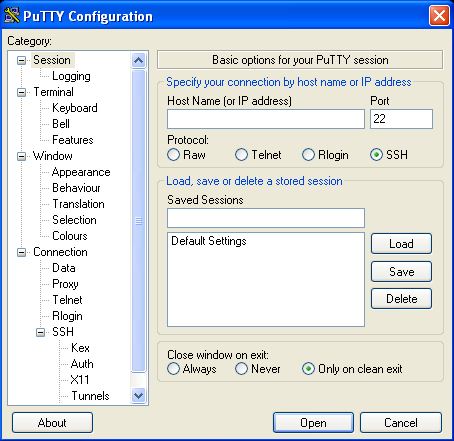
Your VPN service provider will create a new session configuration that will act as your tunnel once you run Putty. You will need to insert the hostname or TCP/IP address of your remote server in the “Host Name (or IP address)” field.
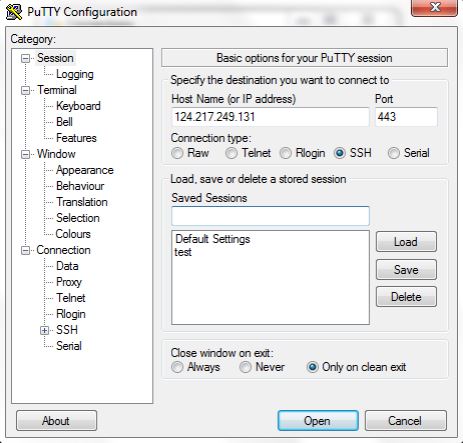
After that, insert any name you want to to identify this configuration in the “Saved Sessions” field. This name will serve as an SSH tunnel.
This is how your Putty window should look like by now:
Next, select “Tunnels” from the navigation tree located on the left side of the Putty window. If it isn’t visible, click on “Connection” node, then click on SSH where you can find it as shown in the figure below:
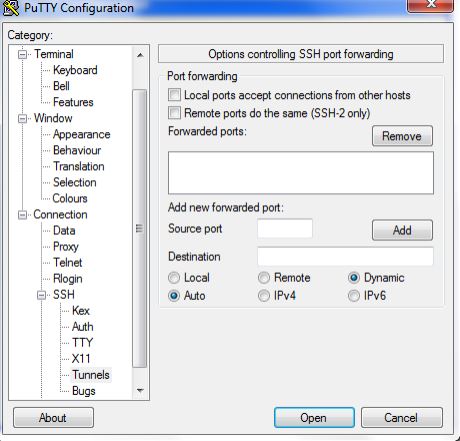
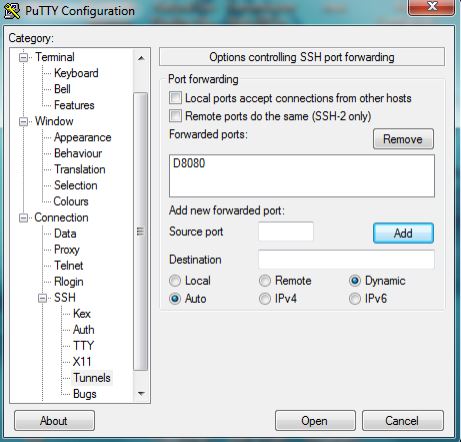
Now, go to “Add a new forwarded port” and enter a port number, for example: 8080 as a source port. Leave the Destination field blank, and then select the Dynamic and Auto radio buttons and click on “Add”. The text D8080 should be displayed in the text field above “Add a new forwarded port“.
If your Putty window looks like the figure below, then you’re on the right track. If it doesn’t, repeat the steps above.
You’re almost there. All you need to do now is click on the “Session” node which can be found at the top of the navigation tree, and then click on “Save” on the right side of the screen to save this configuration.
That’s it! You have successfully configured Putty. What you need to do next is login to your remote server. Just click on the “Open” button at the bottom of the Putty window. You should now be able to see a Putty login shell open up to your remote server. Log into your remote server using your username and password, et voila! You’re now ready to configure OpenVPN.
Step 4: Configure OpenVPN and Use SSH Putty Tunnel as a SOCKS Proxy
Configuring OpenVPN to be used through the SSH tunnel you have created is a piece of cake, if you follow these steps correctly:
1- Double-click on the “OpenVPN GUI” icon located on your desktop or in the “Start” menu.
2- Because the OpenVPN GUI is an system-tray applet, a red icon for the GUI can be visible on the bottom-right corner of the screen, as shown in the figure below:

2- Right click on the system tray icon, a menu showing your VPN service provider’s OpenVPN servers will be displayed.You can also find an option to “Connect”.
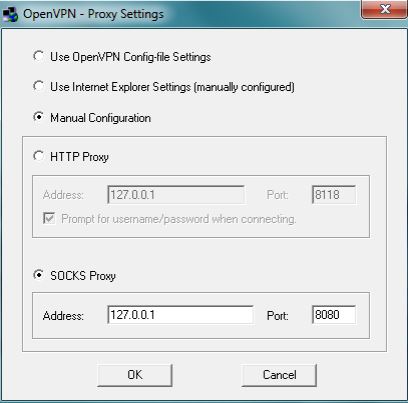
3- Click on “Proxy Settings”, select “Manual Configuration” where you can choose your proxy type. Select “Socks Proxy”, then insert 127.0.0.1 in the address field. Next, insert the port you have chosen for the SSH tunnel, for example: 8080. Then, click “OK”.
4- Use your username and password to connect to your OpenVPN

5- If your process is successful, you will be able to see a connection window as shown below:
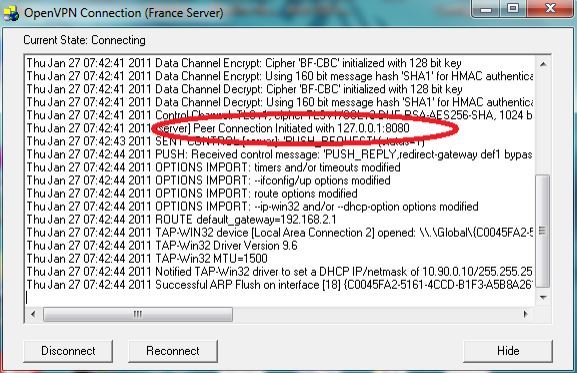
6- Congratulations! Your have successfully tunnelled OpenVPN over SSH and your authentication is now visible in your notification tray.

How to Tunnel OpenVPN over SSH (Automatically)
As you have seen, tunnelling OpenVPN over SSH is rather a long, tangled process that requires a chunk of your time. On the other hand, few VPN services offer a much simpler way to successfully tunnel OpenVPN over SSH without the need to follow a shoulder-breaking list of complex instruction. You can create an OpenVPN over SSH tunnel through just one “tick” on the SSH button, as shown below:
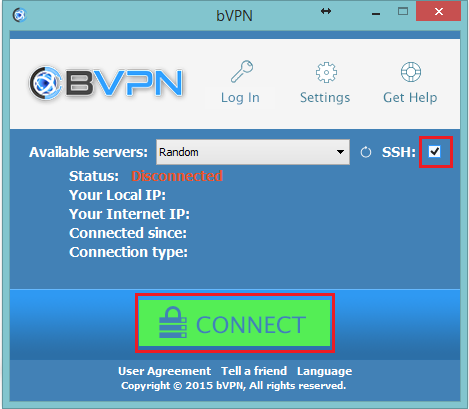
This feature is only limited to a handful of VPN services, such as: Wasel Pro, iWASEL, bVPN. It is one of the most efficient features that add an extra layer to your protection and enable you to bypass the toughest ISPs and SPIs, such as China’s “Great Firewall”, without being detected by any means and in just one click!

One thought on “OpenVPN over SSH Tunnelling – Step-by-Step Tutorial”
Ssafgaghwhwhbssjivjvjvjjf