
Tunnelblick is an open source program developed to establish a secure connection between Mac OS or Mac OS X and an OpenVPN server. Once this secure connection is established, the server will then connect Mac to the internet or any remote network overcoming any network restrictions and internet censorship in complete security, privacy and anonymity.
Tunnelblick is a free application with an accessible Graphic User Interface. It can be launched on OS X 10.7 through 10.11 (“Lion“, “Mountain Lion”, “Mavericks“, “Yosemite“, and “El Capitan“) and macOS 10.12 (“Sierra“). It is a universal application that comes with all the binaries and drivers (including OpenVPN and tun/tap) needed for creating a VPN connection. What you need to do is to add in your VPN configuration file in the corresponding format together with the encryption information.
There is a very common misconception that Tunnelblick provides VPN on its own. The application acts only as a secure bridge for Mac to connect to the VPN server. This server can be provided to you by your VPN service provider.
Setting Up Tunnelblick on Mac OS
Here we are going to show you how to set up Tunnelblick on Mac OS X step-by-step with pictures. Before carrying out the following steps, please make sure that you have an admin permission on your computer. We will use bVPN as an example for a VPN service provider.
I) Installing & Running Tunnelblick
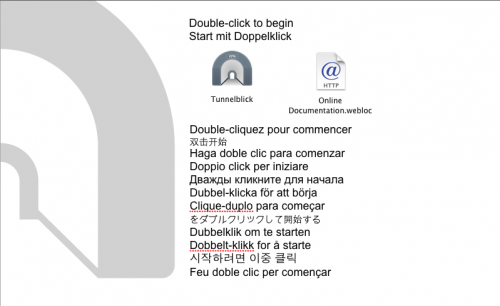
1- Download Tunnelblick from: tunnelblick.net/downloads.html.
2- Follow the on screen instructions in order to successfully install the application.
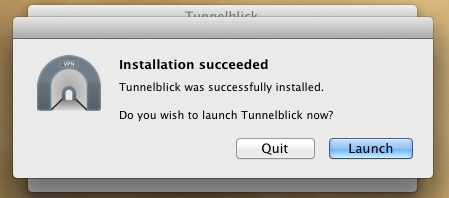
3- A pop-up window will appear to run the application, click on “Launch“.
** It is important to note that most recent versions of Tunnelblick require *.tblk files. In this case, you will need to manually convert your *.ovpn OpenVPN configuration files into *.tblk Tunnelblick files.
II) Converting .ovpn files into *.tblk files Manually (VPN Manual Configuration)
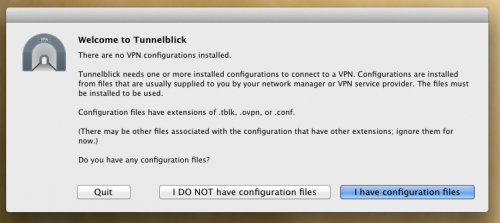
1- When you a pop-up window appears asking you to install VPN configuration files, click on “I have configuration files“.
2- Next, click on “OpenVPN Configuration(s)“.

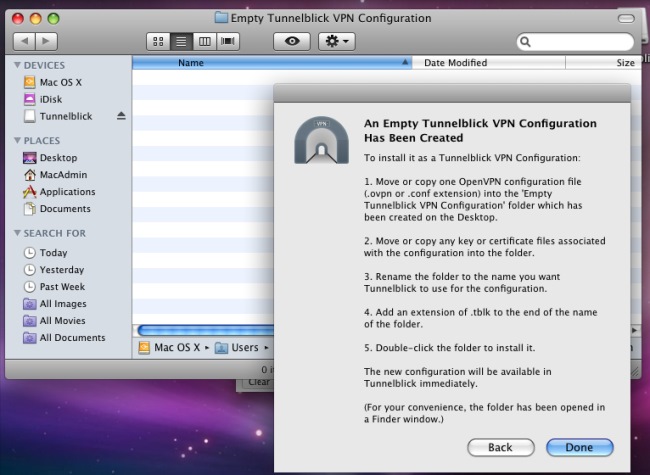
3- If you go to your desktop, you will notice that Tunnelblick has created a folder called “Empty Tunnelblick VPN Configuration“. A pop-up window will appear containing thorough instructions on how to add in a VPN configuration file.
4- Before importing any configuration files into the folder, you need to download the VPN configuration files from your VPN provider’s website (contact your VPN admin in you are unable to carry out this step). For example, go to https://www.bvpn.com/en/accounts/profile/openvpn_server_list/ to download bVPN’s configuration files. Next, make a selection between Protocols and Drivers, and then click “Generate“. You will have the option to choose between TCP and UDP.
5- Add one *.ovpn configuration file (from a server you’d like to use ) by dragging it into the Empty Tunnelblick VPN Configuration folder.
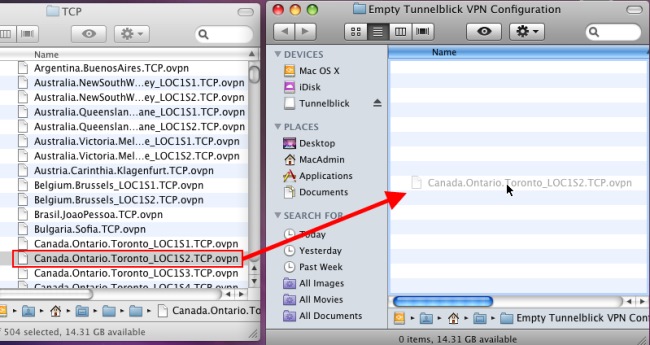
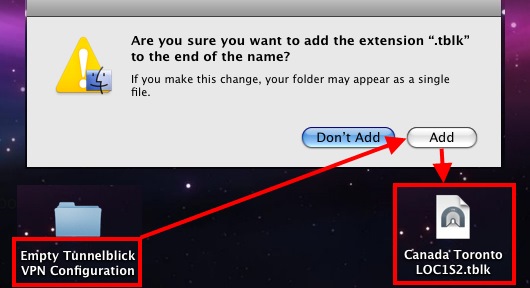
6- Rename the file correctly and make sure to change the extension from *.ovpn to *.tblk to be able to install it. For example, if you selected a configuration file like this: Canada.Ontario.Toronto_LOC1S2.TCP.ovpn, you can rename it “Canada Toronto LOC1S2.tblk“.
7- Once you are done, you will be prompted by a confirmation message, click on “Add” to confirm.
8- Double click on the file “Canada Toronto LOC1S2.tblk“, and then insert your Mac OS X administrator password.
9- A pop-up window will show confirming that the VPN configuration was successfully installed.
III) Testing the VPN Connection
1- You see by now on your menu bar a dimmed Tunnelblick icon (black gate icon). If it is not visible, then you need to run Tunnelblick from Applications.
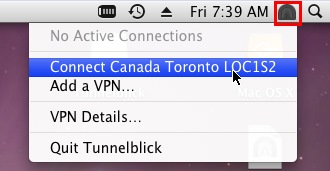
2- On the top right corner, click on the Tunnelblick icon. All the installed VPN connection will appear on the dropdown-list.
3- Click on the VPN connection that you have imported.
4- You will be asked to provide your VPN credentials (username and password). Type in your details, and then check to enable “Save in Keychain” if you wish the application to remember your credentials so you do not have to enter them every single time.
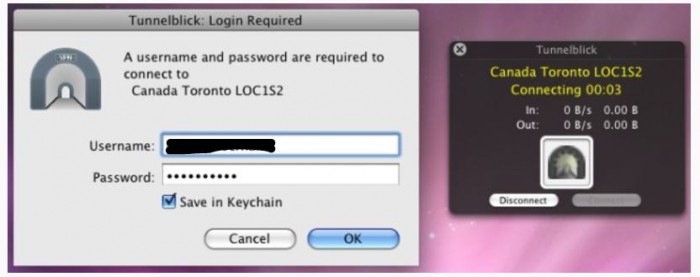
5- The Tunnelblick gate-icon will change colours and open indicating that the VPN connection is successful.
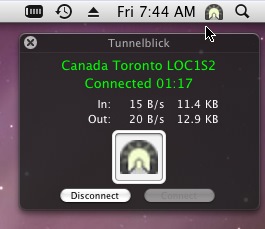
6- You can disconnect by clicking on the “Disconnect” button.


4 thoughts on “How to Set Up Tunnelblick VPN for Mac OS X”
Very good thank you.
good one
Сайт MasterStroy, которая занимается строительству частных домов в столице
Беларуси Masterstroy.by,
просто впечатляет. Опыт и профессионализм, которыми
они обладают, подтверждают их
квалификацию. Я просто в восторге от предыдущих
работ, как они способны воплощать мечты в жизнь.
Каждый строительный проект, несет в себе свою неповторимую атмосферу,
что делает компанию MasterStroy настоящими мастерами.
Я безмерно рад, чтобы они приступили к строительству моего будущего уютного
уголка!
Прекрасный материал! Действительно интересно узнать о автомобильных ключах
для Шкода. У меня тоже есть автомобиль Шкода,
и я всегда волновался по поводу пультов.
Ваша информация полезная и информативная.
Заметил упоминание о дилерском центре
и сайте Skodakey pageoftoday.com.
Это действительно важно, потому что безопасность и надежность ключей
для автомобиля – это важнейший аспект для всех владельцев.
Я обязательно рассмотрю эти варианты при замене ключей.
Спасибо вам за полезные сведения,
пожалуйста, продолжайте публиковать такие интересные статьи!