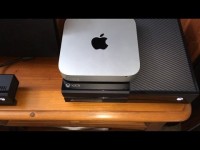
Xbox is one of the most popular gaming consoles in our world today. It was initially developed by Microsoft back in 2005 and went on to produce 8 generations including the latest of them all Xbox One, which was officially launched in 2013 offering gaming and online services to millions of users. Xbox Live is one of the online services offered by Microsoft for Xbox 360/One users. Users can play online games against other opponents online.They can also download full games and demo from the Xbox Live Arcade. Users can also communicate with their friends and chat with new friends online.
In order to secure your Xbox One or 360 accounts, a VPN would be ideal to protect your data and secure your connection online. Gamers can be competitive sometimes and they would do anything to win even launching cyber attacks against each other.
In this tutorial, we will show you how to setup VPN on Xbox One or Xbox 360 on Mac OS in simple and easy steps.
Configuring VPN on Xbox One or Xbox 360 through Mac
1- Use a crossover cable to connect your Xbox One or Xbox 360 to your Mac computer.
2- At the bottom of your home screen, go to “System Preferences”, and then choose “Sharing”.
3- Once you are in the “Sharing” page, choose “Internet Sharing”.
4- Click on “Share Your Connection From” to expand the drop down menu, and then choose “AirPort”, “Ethernet” or “Wireless”.
5- Expand the drop down menu “To Computers Using”, and then choose “Ethernet”.
6- Mark the checkbox “Internet Sharing” to be able to share your internet connection.
7- Once activated, you will notice that the ‘Internet Sharing’ icon has turned green & its status is now set to “On”.
8- Once done, click to open your VPN application on your Mac system and connect to your preferred server.
9- Now, go to your Xbox 360 & Xbox One controller, and then press “LIVE” to display the menu.
10- Next, go to the “Settings” tab, and then choose “System Settings”.
11- From the “Settings” tab, choose “Network Settings”.
12- Once you are in the “Network Settings” tab, choose “Wired Network”.
13- The moment your Xbox detects the internet connection, you are ready to roll.


