What is L2TP
Layer 2 Tunneling Protocol or L2TP is a tunneling protocol used by most VPNs, however on its own it does not provide any confidentiality hence it is always used with another protocol called Internet Protocol Security or IPSec. The VPNs that use it always display it as L2TP with IPSec or L2TP/IPSec as IPSec is responsible for the security side of the information being transferred through this tunnel keeping them confidential.
Most VPNs allow you to connect more than one device simultaneously in order to secure all your internet connected devices. The question here is that do we need to install the VPN application on each and every device in order to do that? The answer is no, since you can only install the application on your main device and through it you can configure the security protocols(L2TP with IPSec or L2TP/IPSec and all the other protocols) provided by the VPN manually on the rest of the devices.
In this tutorial we will go through the very simple steps of configuring the L2TP protocol on your Windows 10 device. We will be using bVPN as our main VPN client.
About bVPN

bVPN is a Netherlands based VPN provider that was launched in 2014 with the core mission of providing a highly secure and private internet experience for its users. It is famous for its high security features. Besides the use of all the advanced security protocols (OpenVPN, L2TP with IPSec or L2TP/IPSec, PPTP, etc.), they have their very own Smoke Tunnel protocol which is the most advanced in the market as it is known to be the best protocol in bypassing the Great Firewall of China.
How to Configure L2TP on Windows 10 using bVPN
bVPN provides its users with the ability to connect up to 7 devices simultaneously which is a number unmatched in the market. Now configuring L2TP on Windows 10 using bVPN is a very simple procedure in order to keep any Windows 10 operated device you have secure.
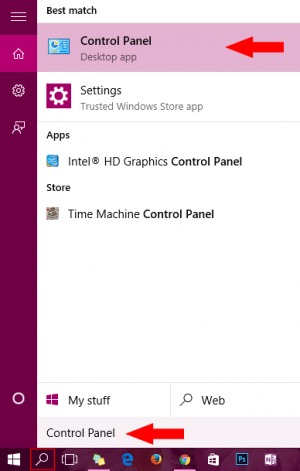
1- On the task bar, click on the search icon and type “control panel“. Click on the first result that appears.
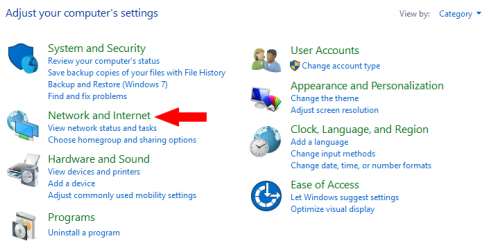
2- From the control panel, click on “Network and Internet“.
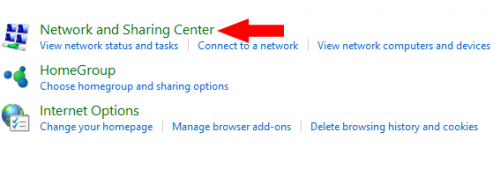
3- Click on “Network and Sharing Center“.
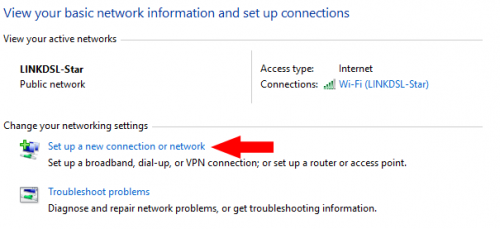
4- Under “Change your network settings“, click on “Setup a new connection or network“.
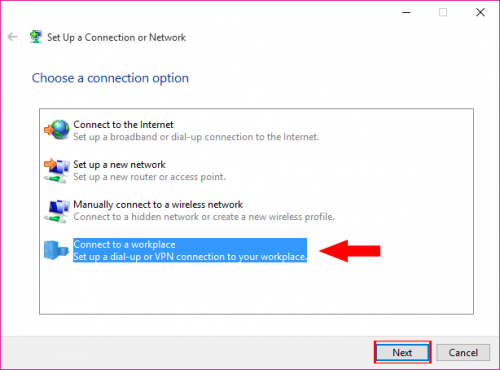
5- Click to highlight “Connect to a workplace” and click “Next“.
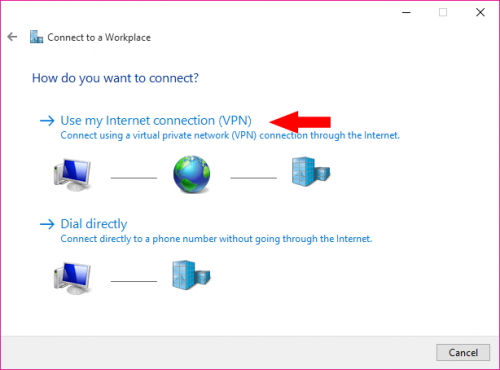
6- Out of the 2 options that will appear, click on “Use my internet connection (VPN)“.
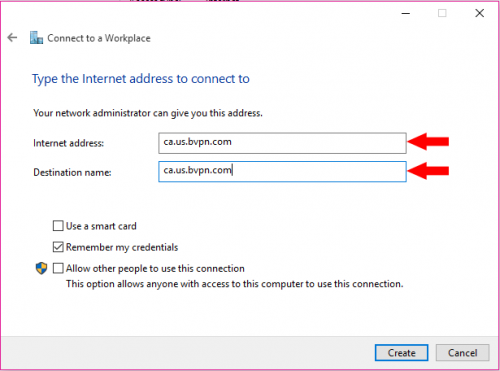
7- At this point you will find 2 fields; “Internet address” and “Destination name“. In the “Internet address” field, enter the name of the server you want to access (for example, ca.usa.bvpn.com). In the “Destination name”, you can insert any name you prefer, however it is recommended to use the server address again (ca.usa.bvpn.com). Once both fields are complete, click on “Create“.
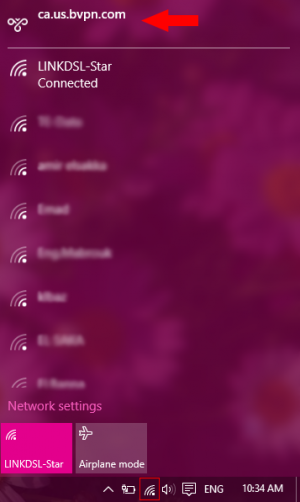
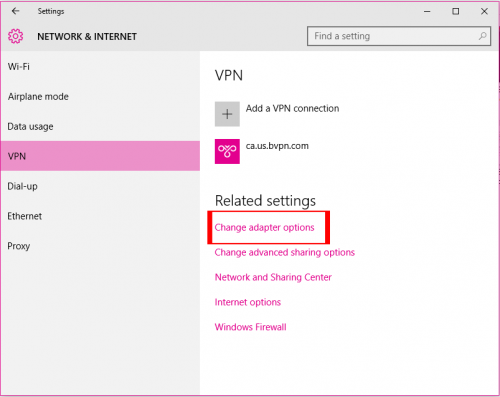
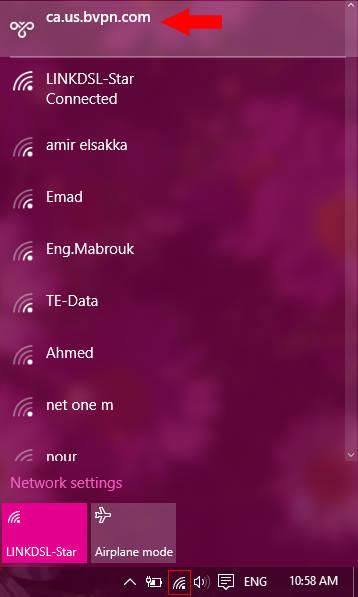
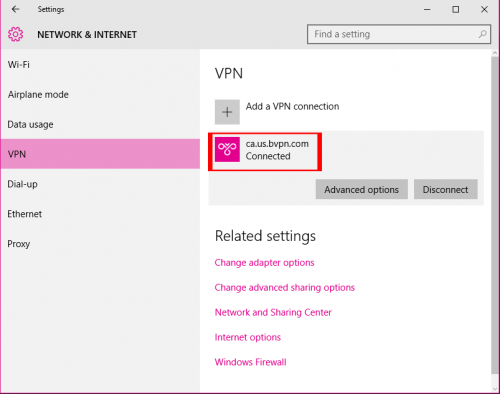
8- Back on the homepage, click on the connection icon. Now click on the connection name you have just created (ca.us.bvpn.com).
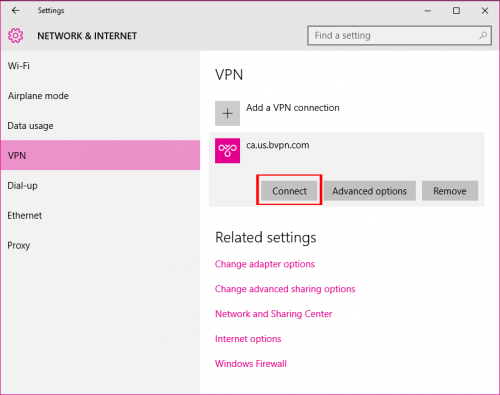
9- Under the “Related settings” section, click on “Change adapter options“.
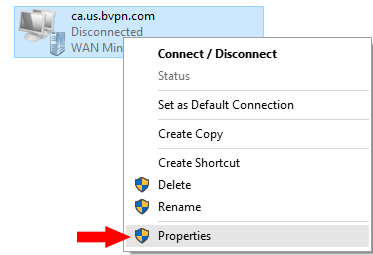
10- Right click on your connection name and click on “properties“.
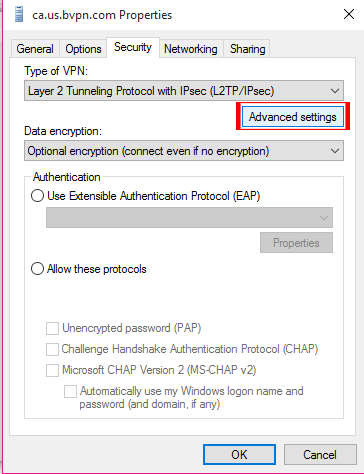
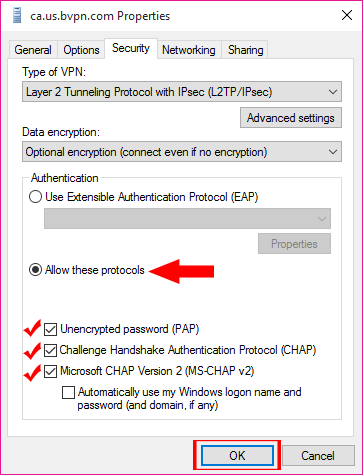
11- At the top of the properties widow, click on the “security” tap. Click on the dropdown menu under “Type of VPN“. Choose “Layer 2 Tunneling Protocol with IPSec (L2TP/IPSec)“

12- Below the “Type of VPN” part, click on “Advanced settings“.
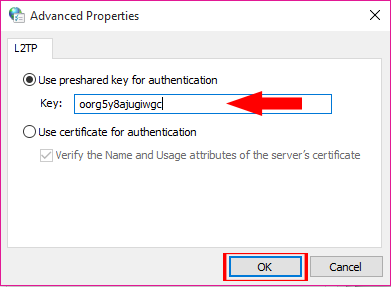
13- Click on the “Use preshared key for authentication” radio button. Enter the matching key (This can be found on your profile page). After that, click “Ok“.
14- Back in the properties window, under the security tab, select “Allow these protocols“. Check all the 3 protocols and click “Ok“.
15- Back on the homepage, click on the connections icon again and choose the VPN connection created by you.
16- Click on “Connect“.
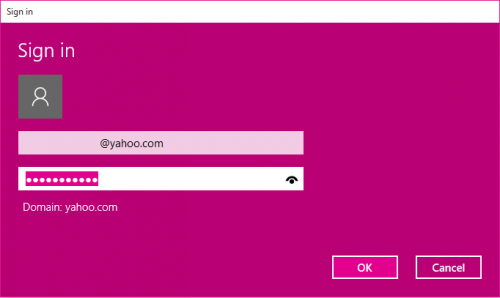
17- Insert your bVPN credentials and click “OK“.
18- Wait for it to connect. Once it appears as connected, this means that you have successfully configured L2TP.
Conclusion
Even though it looks like a long process, however in reality it does not take more than 2 minutes to configure. Now you can enjoy keeping your Windows 10 device secure with a L2TP with IPSec or L2TP/IPSec connection through your bVPN account without going through the hassle of reinstalling the application on each and every device. Of course every platform has its different procedures yet they are all equally simple to go through.