DNS or Domain Name System is the translated version of an IP address to a name that is understandable by humans. Since computers only communicate through numbers in the form of IP addresses (e.g. 137.46.78.189). We needed it to be transformed into something that humans can remember. Here is where DNS comes in where it translates IP addresses into names or websites that we can remember (e.g. vpnanswers.com). When a connection is established between an internet user and the ISP server, the user is automatically provided with a default DNS from the server. This DNS is not precisely very reliable and can sometimes expose the user to online security risks. There are alternative DNS online which can be used and can be more secure and more reliable than that provided by the ISP. There is a simple way to change the DNS used by a computer. This way or method differs from one operating system to another.
In this tutorial, we will be demonstrating how the DNS can be changed in the network settings on Windows 10 by going through a few simple steps.
Steps for Changing DNS Servers on Windows 10
Below are the steps required to change DNS servers in Windows 10. Make sure get an admin access before taking actions, otherwise, you will not be able to carry out the following steps:
1- Go to Control Panel.
2- Locate “Network and Internet“, and then click to open it. Some users may be able to select “Network and Sharing Centre“. In this case, skip the next step and click on “Network and Sharing Centre“.
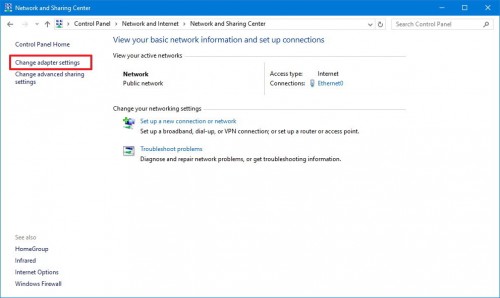
3- Once you open “Network and Sharing Centre“, select “Change Adapter Settings” from the left panel.
4- A new window will open in which you can select the internet connection you want to change the DNS settings for. It could be a wired or a wireless connection.
5- Right-click on the internet connection you are changing the DNS servers for and click on Properties.

6- Scroll down the list until you find Internet Protocol Version 4 (TCP/IPv4), and then select it.
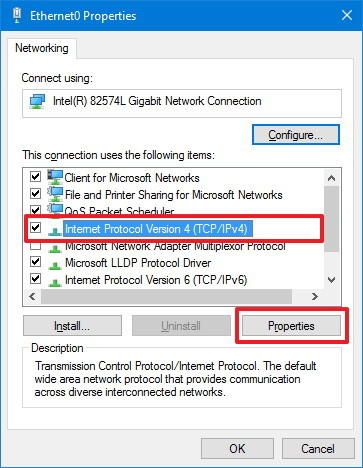
7- After you make your selection, click on Properties.
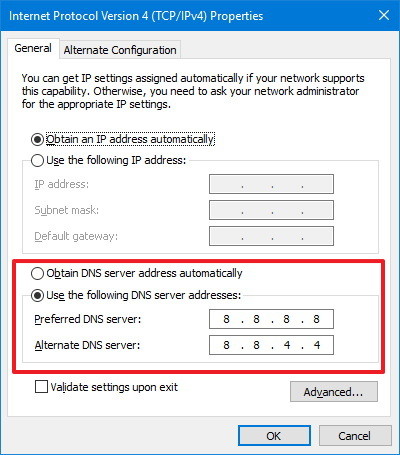
8- Next, click on the radio button next to Use the following DNS server addresses.
9- This is the step where you can type in your DNS server addresses in the “Preferred DNS server” and “Alternate DNS server” fields. You can check our small list of suggested DNS servers here.
10- Once you are done, click on “OK” to save your settings.
11- Close all open windows.
12- Now your Windows 10 system will automatically use the DNS settings that you have applied.
13- You can test the efficiency of the DNS settings you have made by visiting different websites. The pages should load either at normal speed or faster than what you are used to.
Congratulations! You have successfully changed your DNS server settings on Windows 10.
