We have previously explained how to make changes to DNS server settings on several platforms, including: Windows and Mac OS. In this article, we will show you how to change your DNS settings on your Android device. Short for “Domain Name Server“, DNS is like the phone book of the internet. It contains lists of domain names to interpret them into IP addresses. Internet users can easily remember names of domain, however, machines and computer need to store IP addresses in their memory. Your internet server provider usually gives you default DNS server addresses upon subscribing to their services. However, these DNS servers tend to become slow in time which affects your browsing experience. Changing DNS server settings help you to improve your navigation process on the internet.
Changing DNS Settings on Your Android Device
Like iOS, Android only allows its users to make changes to DNS settings when connected to WiFi only. It does not permit any changes to be made to the DNS settings through mobile data connections. Below are the necessary steps needed to be taken to successfully change DNS settings on your device.
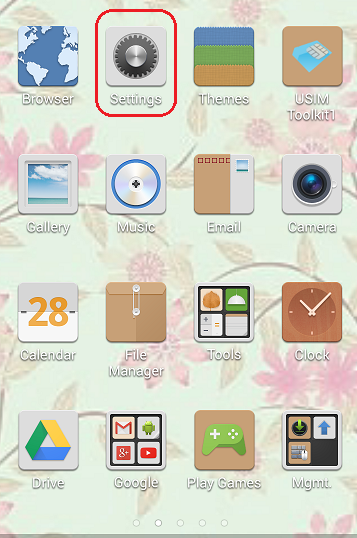
1- From your “Home” screen, go to “Settings”.
2- From “Settings”, tap on “WiFi”. You can also open your WiFi on your device by pulling down the notification bar, and then long-press on your “WiFi” network icon.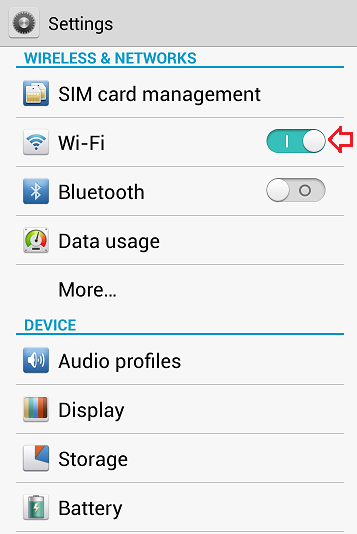
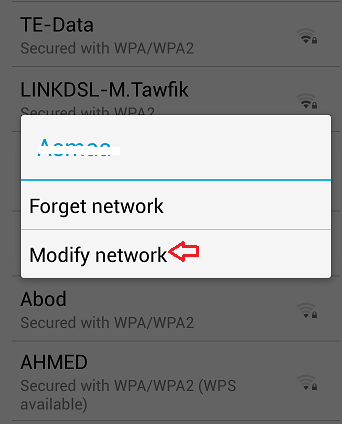
3- Tap on “Modify Network” to launch the network options for your current WiFi connection. Depending on the make and model of your Android device, you will need to either long-press on your WiFi network, tap on “Modify Network” or slide an arrow on the side.
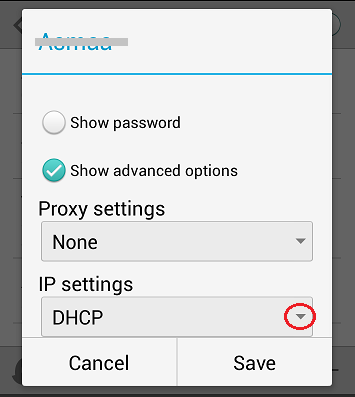
4- Tap on the radio button next to “Show Advanced Settings”.

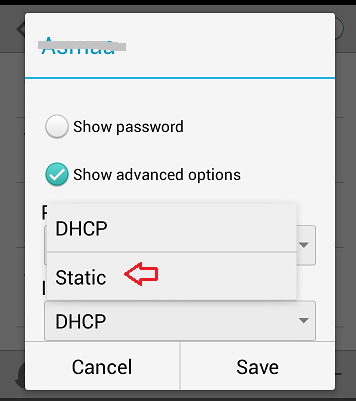
5- Now, change the “IP Settings” from “DHCP” to “Static”.
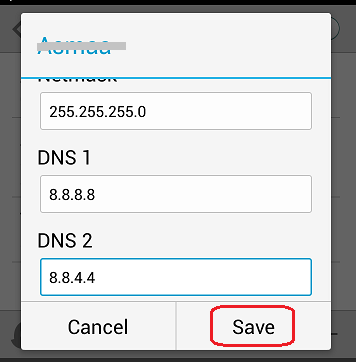
6- You find two fields for you to insert the IP addresses for the DNS servers you want to connect to. You can use public domains like Google public DNS or OpenDNS to access blocked websites together with a VPN. Check our list of suggested DNS servers here.
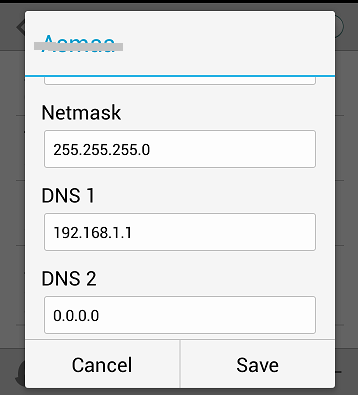
7- Tap on “Save” to save the changes you have made.