Why do you need to change Proxy on Android
The main two reasons for adding proxy settings on Android devices are:
- Surf the Internet anonymously: by hiding your identity and your geographic location.
- Defeat Internet censorship in your region: get access to any blocked webpage or service.
To set proxy on Android phone or tablet, follow these steps:
*These steps are applicable to all Android versions
Get the information of the proxy-server from the network administrator.
Open the Applications tab, tap Settings, and tap Wireless & networks, make sure the wireless network is enabled.
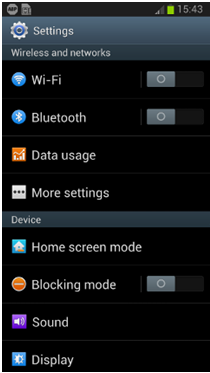
Proxy on Android -1
- Tap Wi-Fi settings, in the list of available networks, tap and hold the network to which you are connected and want to set the proxy server, until a menu shows.
- Tap Modify network configuration.
- Mark Show advanced options check box. Tap Proxy Settings, and then manual proxy options will appear.
- Enter the Proxy hostname, and the proxy port number. Optionally, under Bypass proxy for, you can enter the domain names for which the proxy does not need to be used, typically intranet websites in a corporate network.
- Tap Save.
